Schematic examples of the Safety Chain for RTU’s – Part 1
Tip: click the images to open an enlarged view in another tab. Close the tab to return to the article.


Last month we covered the importance of labeling and documenting on a Carrier VRF Heat Recovery system. Documentation during Installation is key in the end success of any of these systems. This month we will cover electronic addressing.
Electronic address, not to be confused with port address, is the address assigned to a unit to signify where it is and can play a very important role especially in the case of external control such as I-Vu or any other 3rd party control company. The easiest way this can be explained is this: The ODU is your house, each IDU is a room in your house. You basically tell each IDU what “room” it is with electronic addressing.
With Carrier VRF there are several ways to address a system. Heat recovery systems can be addressed by using a wired or wireless controller. They are as follows:
40VM900003 – Wired Programmable control.
40VM900002 – Wired Non-Programmable Control
Or
40VM9000001 – Wireless Remote
Bear in mind that the wireless remote option requires the use of the display board and works well for 4-way cassettes in high ceilings.
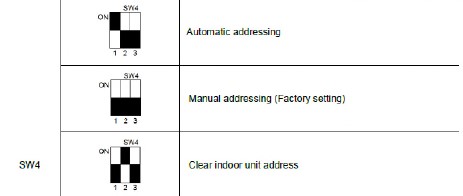
Now that we have an address set for each IDU we need to make sure a few things. We need to ensure while doing the addressing that we not duplicate addresses except for in very few circumstances. This information should be notated somewhere like on the MDC as explained last month in Heat Recovery. Heat pump systems do have the ability to auto address via the “S6” (3 phase) and “SW4” (1 phase) Dipswitch bank in the ODU on the Main board. Factory default is auto search (Off Off) on the switch bank.
3 Phase:

1 Phase:
Now that we have the IDUs addressed what next?
If the systems are going to be on a Bac-Net or touch screen, the ODU needs to be addressed as well. This is easily accomplished by changing ENC 4 on 3 phase units and ENC 2 on 1 phase units.
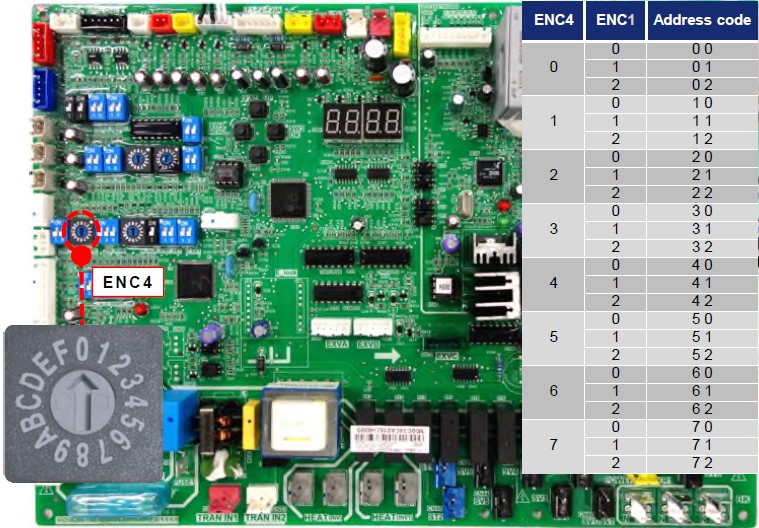
With all the addressing setup you just need to turn it on and get the system going. You can see why labeling and documenting any changes made can be very important. Once you make changes on a system with more than 10 IDUs things can get confusing very quickly.
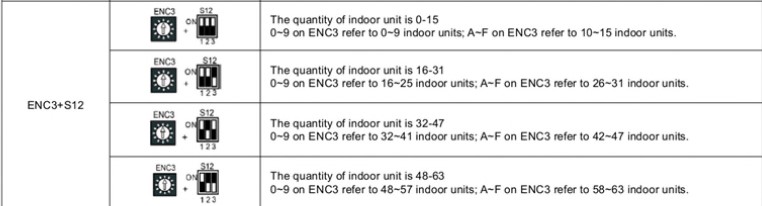
Don’t forget to change ENC3 + 12 on the ODU main board to indicate how many IDU’s are connected and communicating!
Now you have addressing setup and ready to roll. What have we done? Find out next month what all this means.
Disclaimer: The technical statements, information and recommendations contained herein are believed to be accurate as of the date hereof, but Mingledorff’s does not make representations or warranties, express or implied, as to its accuracy, its completeness, or the results to be obtained. The information is being provided for informational purposes only and is intended for use by persons having adequate skill and expertise regarding the proper selection, use and application of the products and recommendations and at their own risk and discretion.
Tip: click the images to open an enlarged view in another tab. Close the tab to return to the article.
Carbon Monoxide is a colorless, odorless, tasteless gas that can be extremely dangerous and even deadly. Because you cannot see
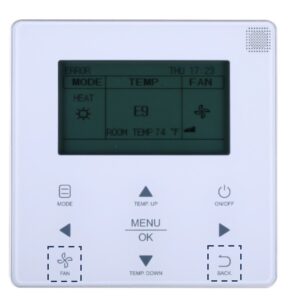
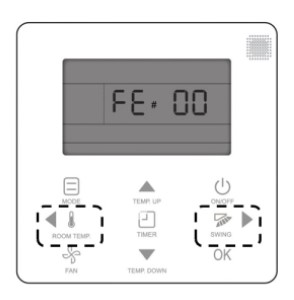
Have you ever had a fault code 44 on a FE4 or FE5 infinity or evolution fan coil? Do you
We use cookies and other tracking technologies to collect and store information, operate our website, remember your preferences, deliver targeted ads and content, and enhance your experience. You can manage or change your cookie preferences at any time through your browser or device settings. To learn more, including how we collect, use, or disclose your information, please review our Privacy Policy and Terms of Use. By interacting with this cookie banner or accessing the site, you consent to our Privacy Policy and Terms of Use, including the arbitration provision and class action waiver.