

Other ways to check your defrost thermostat when you don’t have ice around it, is to run the heat pump on heat mode and carefully remove the black wire from the relay on top of the defrost board. This will stop the fan from running and the condenser coil should start frosting, making the temperature of the defrost thermostat 32° ± 3°F and checking the resistance until it closes reading 0.0 ohms indicating that is working properly. If not, it may be stuck open. Replace the thermostat. You can also remove the defrost thermostat from the heat pump and insert it into a cup with ice and water. Make sure the water its 32° ± 3°F, that way you know if it closes, the defrost works. If not, replace.
The other problem could be it’s stuck closed. You always need to know the temperature that surrounds the defrost thermostat. If it is attached to a pipe, you need to know the temperature of that pipe. Otherwise, you will be guessing. In the photo below, we have a temperature above 65° ± 5°F. We know the defrost thermostat should be open and on this defrost sensor it is open.
February 19, 2025
Tech Mate Pro: Fast, Accurate ECM Testing
Working on any system that has an Electronically Commutated Motor (ECM) is always a challenge.
This type of motor receives an input voltage or communication signal to determine the operating speed . But, how do you test such a motor? Mingledorff’s has two tools that provide guess free, stress free, and accurate diagnosis in a fraction of the time you’d spend using a voltmeter and troubleshooting chart.

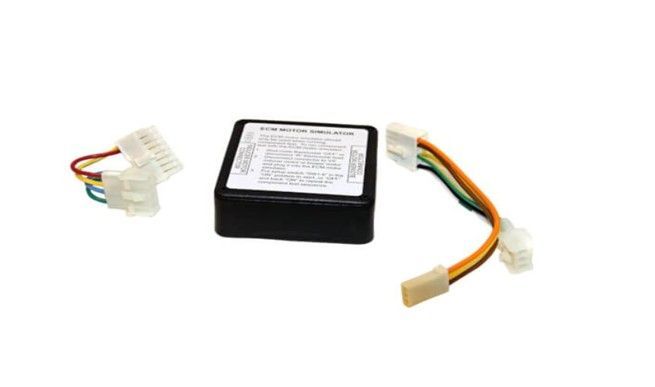
The KGBSD0301FMS for variable speed motors found on some furnaces.
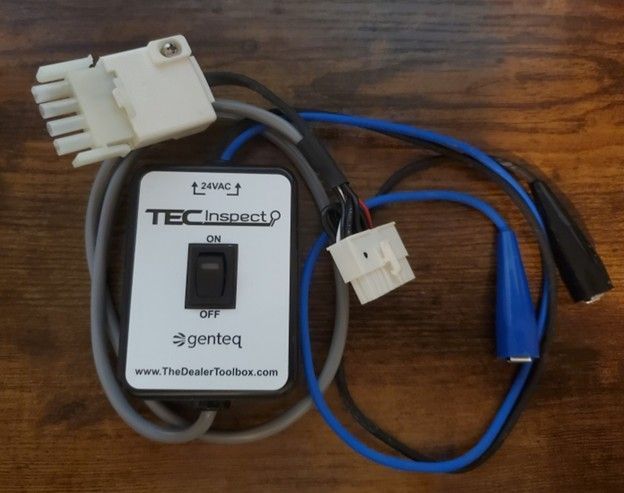
Other ECM testers are designed to isolate the blower motor and help the technician determine if the blower motor is defective, like the Tech Mate Pro KFASD0301VSP. The ECM tester can only be used to test the variable speed ECM 2.0 and 2.3 blower motors on thermostatically controlled systems. This includes residential fan coils , small packaged products, some models of 80% furnaces and 90% condensing furnaces. This tester should not be used on 2.5 motors.
The ECM Tester contains alligator clips to connect to the 24Vac from the circuit board of the unit being tested.
Note: This tester will rotate the motor a portion of the expected airflow. This is not intended to replace the functionality of the board.

Figure 1: Tech Mate Pro KFASD0301VSP
Testing the motor with the Tech Mate Pro:
- Shut off power to unit.
- Unplug the 16-pin connector for ECM 2.0 and 2.3 motors or the 4-pin connector for ECM 3.0 motors. Leave the 5-pin high voltage plug connected to the ECM blower motor. Plug the 16-pin connector for ECM 2.0 and 2.3 motors or the 4-pin connector for ECM 3.0 motors from the ECM Tester shown in Figure 1. to the ECM motor.
- Attach the blue lead of the tester to the R terminal on the unit control board and the black wire to the C terminal on the unit control board. The ECM 3.0 may require the use of additional alligator clips or piggy-back connectors.
- Turn on power to the unit. The green POWER LED found in the switch should light up.
- The green motor LED is attached to the output pins of the motor. The LED will blink dimly when the motor power is turned on. As the revolutions per minute of the motor increase, the brightness of the LED will increase.
Disclaimer: The technical statements, information and recommendations contained herein are believed to be accurate as of the date hereof, but Mingledorff’s does not make representations or warranties, express or implied, as to its accuracy, its completeness, or the results to be obtained. The information is being provided for informational purposes only and is intended for use by persons having adequate skill and expertise regarding the proper selection, use and application of the products and recommendations and at their own risk and discretion.
More to Explore


