It is a good practice to make sure all of your dip switches are set to the factory position on all of your flow selector boxes during installation. If the dip switches are not set in the factory position you will have L11 and E17 error codes to follow. You can verify the factory dip switch settings by looking at access door on the flow selector box. The L11 and E17 error codes can also be caused by wiring issues, good wiring practices can prevent having problems.


Changing dip switches on your flow selectors is not necessary because all of your flow selector addresses and port numbers are set using and codes 00FE and 0105 on your thermostat. Making sure your flow selector address and your flow selector port address is correct will make the start up process much easier. If care is taken and you have a good understanding of the wiring and installation of a VRF system the start up process can be close to seamless.


L11- Detected indoor unit address, Flow selector unit not connected.


E17- Communication trouble between indoor unit and flow selector unit.

Once you have logged in, you will need to save the equipment current configurations by choosing: “SAVE CONFIGS TO A FILE”. Align the arrow on the SAVE CONFIGS TO FILE option and press ENTER. Then press ENTER to make the STOP flash, use the UP or DOWN arrows to change the STOP to START and press ENTER. Once this is done, Choose Option 5 to UPGRADE SOFTWARE. Then scroll down to “FIND APPLICATION FILE” and press ENTER to change NO to YES.
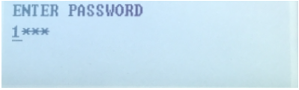
Blue screen prompting “ENTER PASSWORD” with masked password entry “1***”

Then press ENTER to choose the USB Product Folders:
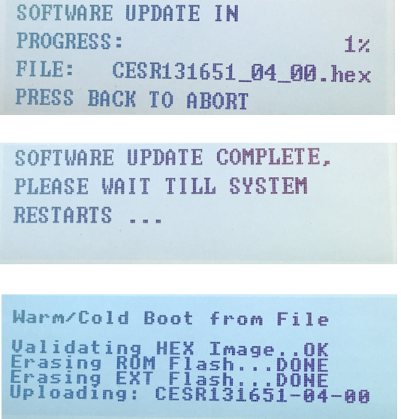
System update screen showing file update progress, completion message, and boot log text.

Then select the Product Software: Once selected press ENTER.
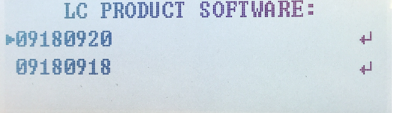
Close-up of a white screen showing blue text: “LC PRODUCT SOFTWARE” and two numbers.

Austin Caldwell

Technical Services Manager North Georgia District

November 15, 2023

The Building is Hot, and I Need My Chiller Back Online

This is not a fun phrase to hear when you talk to the customer on-site. It gets worse when you open the panel door and see the Comfort link panel flashing. This can be a touch overwhelming but let’s drive forward into the problems and see what the machine is doing.


The Comfort link board shows codes T134, T113 and T093. The First Code is Circuit B Low Suction Pressure. This code will show if the suction pressure on the circuit is below 23 psiq. The Second Code Circuit B loss of Charge, This code will show if the Suction and Discharge pressures are under 26 psig. The Final Code is Circuit B Suction Pressure Transducer Failure, This code comes on when the suction pressure is outside of the range. Looking at the codes it’s very clear after putting gauges on the circuit to confirm there is no gas in circuit B. This will be the method of getting A circuit back online.


Procedures for getting the chiller back online


  1. Turn the SW1 switch to the center position. This allows the MBB to take the commands without having a moment of issue.
  2. Go to the configuration menu on the Comfort link. Then go down to the SERV
  3. Select enter and go down to EN.B1 and disable the remaining B circuit Compressors depending on the size of the chiller.
  4. Take the Suction pressure transducer off the pipe. It is located next to the B1 compressor.
  5. Take the Circuit B Discharge Transducer off the pipe it is located behind the compressors on the Discharge header.
  6. Using your Gauges Thread the Suction transducer on the low side line. Then thread the discharge to the high side of your gauges. Using a refrigerant gives the 2 transducers about 145 PSIG.


Once Completed go into the alarm menu to reset the alarms. This will allow the machine to run on A Circuit when B is down. This is a great tip when you run into a jam on this particular style chiller to get supplement cooling back into the space


Disclaimer: The technical statements, information and recommendations contained herein are believed to be accurate as of the date hereof, but Mingledorff’s does not make representations or warranties, express or implied, as to its accuracy, its completeness, or the results to be obtained. The information is being provided for informational purposes only and is intended for use by persons having adequate skill and expertise regarding the proper selection, use and application of the products and recommendations and at their own risk and discretion.


More to Explore

September 16, 2026
Disclaimer: The technical statements, information and recommendations contained herein are believed to be accurate as of the date hereof, but Mingledorff’s does not make representations or warranties, express or implied, as to its accuracy, its completeness, or the results to be obtained. The information is being provided for informational purposes only and is intended for use by persons having adequate skill and expertise regarding the proper selection, use and application of the products and recommendations and at their own risk and discretion. 
By Jesse Van Atta September 16, 2026
Disclaimer: The technical statements, information and recommendations contained herein are believed to be accurate as of the date hereof, but Mingledorff’s does not make representations or warranties, express or implied, as to its accuracy, its completeness, or the results to be obtained. The information is being provided for informational purposes only and is intended for use by persons having adequate skill and expertise regarding the proper selection, use and application of the products and recommendations and at their own risk and discretion.