It is a good practice to make sure all of your dip switches are set to the factory position on all of your flow selector boxes during installation. If the dip switches are not set in the factory position you will have L11 and E17 error codes to follow. You can verify the factory dip switch settings by looking at access door on the flow selector box. The L11 and E17 error codes can also be caused by wiring issues, good wiring practices can prevent having problems.


Changing dip switches on your flow selectors is not necessary because all of your flow selector addresses and port numbers are set using and codes 00FE and 0105 on your thermostat. Making sure your flow selector address and your flow selector port address is correct will make the start up process much easier. If care is taken and you have a good understanding of the wiring and installation of a VRF system the start up process can be close to seamless.


L11- Detected indoor unit address, Flow selector unit not connected.


E17- Communication trouble between indoor unit and flow selector unit.

Once you have logged in, you will need to save the equipment current configurations by choosing: “SAVE CONFIGS TO A FILE”. Align the arrow on the SAVE CONFIGS TO FILE option and press ENTER. Then press ENTER to make the STOP flash, use the UP or DOWN arrows to change the STOP to START and press ENTER. Once this is done, Choose Option 5 to UPGRADE SOFTWARE. Then scroll down to “FIND APPLICATION FILE” and press ENTER to change NO to YES.
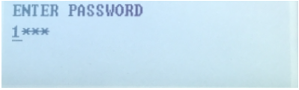
Password entry screen with “ENTER PASSWORD” text and masked characters on a light blue background

Then press ENTER to choose the USB Product Folders:
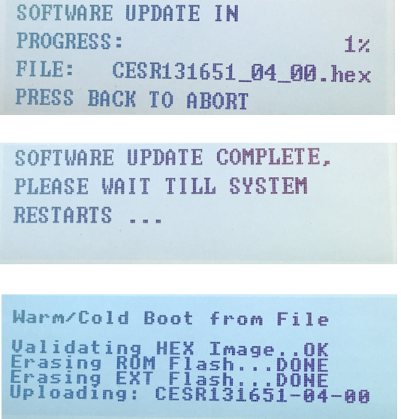
Device firmware update screen showing progress, completion, and boot log messages on a blue display.

Then select the Product Software: Once selected press ENTER.
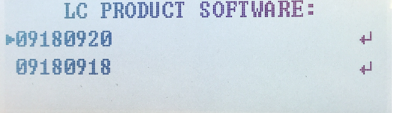
Blue text on a pale screen reading “LC PRODUCT SOFTWARE:” with two numbers underneath.

Austin Caldwell

Technical Services Manager North Georgia District

July 10, 2023

My Comfort Link Board is Not Working

Comfort Link controls on Carrier equipment have been around large package units to Chillers for about 15 years. It is a great control system for the ability to read codes and make changes on the machine without the need for computers or extra tools. The problem happens when it fails – you start having issues from burn inputs or outputs or internal shorts. Here are some tips on replacing and working with this board.


The Main Base Board or MBB is the brain of the control system. The MBB is the combination between a computer and an electromechanical board. This board holds all inputs from every thermistor to all transducers, it also is the ccommunication circuit between every auxiliary board on the unit. This board will allow you to run the entire machine per spec with just a start signal.


The problem happens with this board from burnt wires shorting the input side, to a simple hardware glitch that can kill the board. A common misconception when you order the board from the counter is it’s programmed to your exact machine. That is not the case. RCD puts out a base file for the serial provided. A very good practice before changing the bad board is going through the old board configurations. It will take about 30 to 45 minutes on the scrolling marquee. When you hit a setting and you don’t know what it is hold Enter and Escape for about 5 seconds and the display will read it out to you. This also works for the navigator which is highly recommended if you work on a lot of these (Navigator Part Number 30GT-911—062). Once you have the settings, swap the Enable/OFF/Remote switch to off and let the machine shut down. Lockout the power and swap the MBB. Once the MBB is swapped return power to the unit. With the enable switch off, go through your configurations and verify there are the same as what you wrote down. Once that is complete set the enable switch to where it was before, and you are ready to go.


Disclaimer: The technical statements, information and recommendations contained herein are believed to be accurate as of the date hereof, but Mingledorff’s does not make representations or warranties, express or implied, as to its accuracy, its completeness, or the results to be obtained. The information is being provided for informational purposes only and is intended for use by persons having adequate skill and expertise regarding the proper selection, use and application of the products and recommendations and at their own risk and discretion.


More to Explore

September 16, 2026
Disclaimer: The technical statements, information and recommendations contained herein are believed to be accurate as of the date hereof, but Mingledorff’s does not make representations or warranties, express or implied, as to its accuracy, its completeness, or the results to be obtained. The information is being provided for informational purposes only and is intended for use by persons having adequate skill and expertise regarding the proper selection, use and application of the products and recommendations and at their own risk and discretion. 
By Jesse Van Atta September 16, 2026
Disclaimer: The technical statements, information and recommendations contained herein are believed to be accurate as of the date hereof, but Mingledorff’s does not make representations or warranties, express or implied, as to its accuracy, its completeness, or the results to be obtained. The information is being provided for informational purposes only and is intended for use by persons having adequate skill and expertise regarding the proper selection, use and application of the products and recommendations and at their own risk and discretion.